

DNS-320 - FunPlug 0.7 + Transmission
Product information:
http://www.dlink.com.my/products/?idproduct=477&idCategory=255
http://sharecenter.dlink.com/products/DNS-320
http://dns323.kood.org/dns-320
Thanks & credits go to the following: 
http://nas-tweaks.net/371/hdd-installation-of-the-fun_plug-0-7-on-nas-devices/
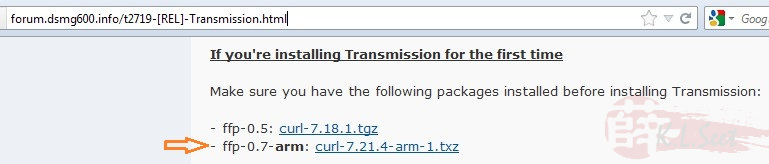
http://forum.dsmg600.info/t2719-%5BREL%5D-Transmission.html
Please read through the above 2 links to understand better before proceeding !
My home NASs as of July'2012 
I have 3 units of DNS-320 and I use 1 of it for FunPlug + Transmission to serve as download center

I hard-reset the device (by pressing & holding the re-set button at the back for >1min) before starting the following setup
After hard-reset, I setup as follows
Consider to subscribe free DDNS account from either no-ip or DLinkDDNS

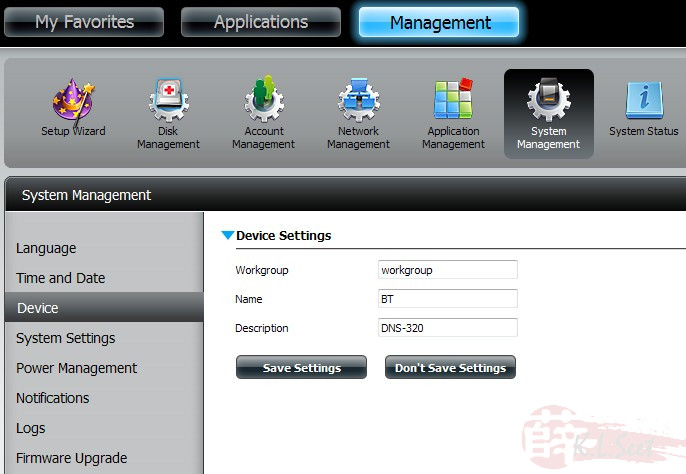
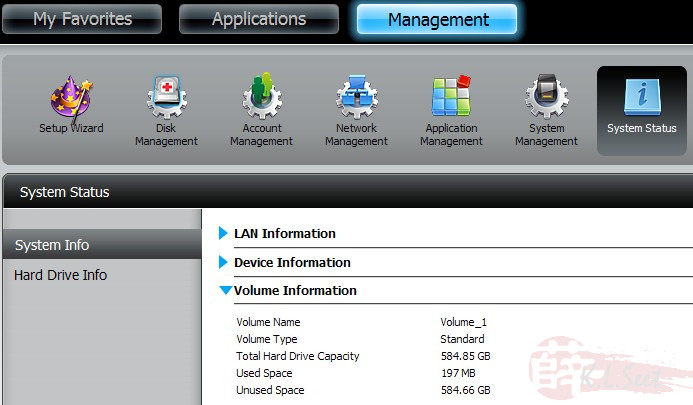
I used a Seagate 640GB SATA and configured as Standard volume
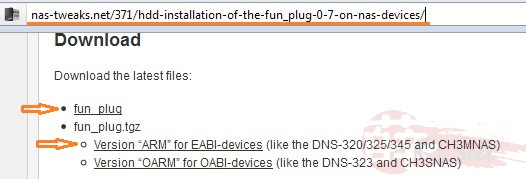
Installing FunPlug 0.7
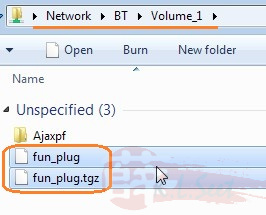
Go HERE and download this 2 files
Navigate and browse Network to locate the device
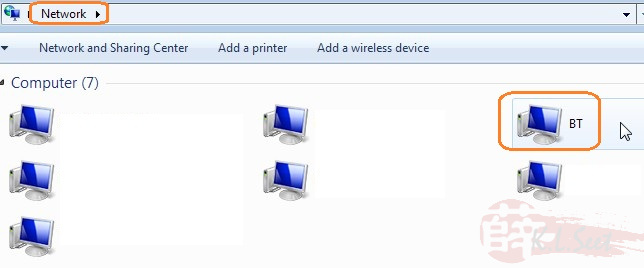
double-click on "Volume_1"
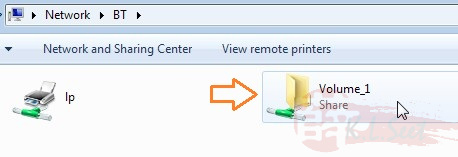
copy that 2 files here (at the top directory of Volume_1)
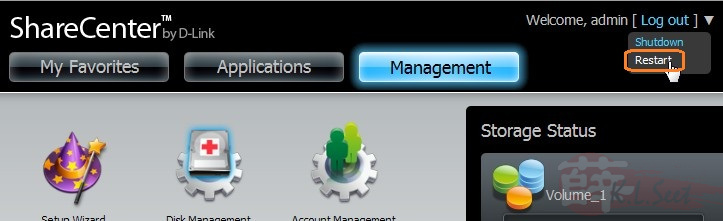
Restart the device
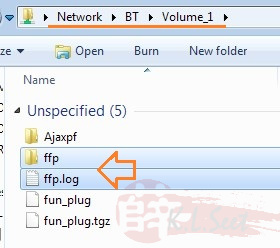
After the device re-booted, navigate to Volume_1, noticed a sub-folder "ffp" and a ffp.log file created automatically --> that means FunPlug already installed !
Next few steps I just followed Uli's guide, thanks to him again !
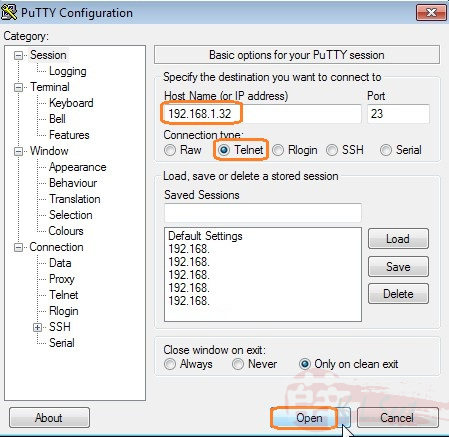
PuTTY to the device via Telnet
Change the device's root password
usermod -s /ffp/bin/sh root
mkdir -p /ffp/home/root/
sed -ie 's#:/home/root:#:/ffp/home/root:#g' /etc/passwd
pwconv

passwd

This step is to store password
wget http://wolf-u.li/u/172/ -O /ffp/sbin/store-passwd.sh
store-passwd.sh

Activate & enable SSH login
chmod a+x /ffp/start/sshd.sh
sh /ffp/start/sshd.sh start

Once done the above, exit PuTTY
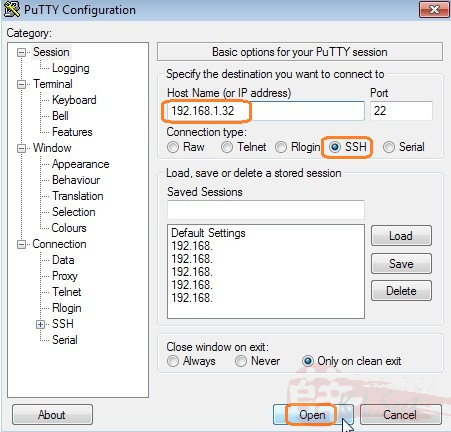
PuTTY login to the device again, this time via SSH mode
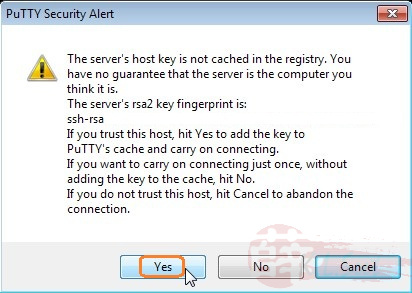
Yes to continue
After able to login successfully via SSH, may consider to disable Telnet mode by entering the following command, then re-boot the device
chmod -x /ffp/start/telnetd.sh
reboot

Basically FunPlug 0.7 installation is now completed, next the Transmission !
Installing Transmission
Either:
Download the 2 files from KyleK as follows : (thanks to him again!)
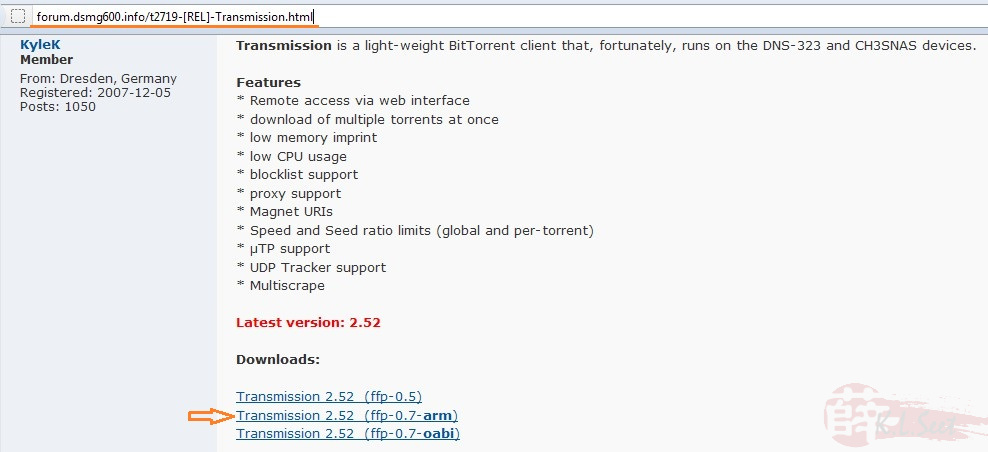
and copy to the following folder:

Or:
PuTTY into the device and wget the 2 files, one after another
wget http://inreto.de/ffp/0.7/arm/packages/curl-7.21.4-arm-1.txz
wget http://kylek.is-a-geek.org:31337/files/ffp/0.7-arm/Transmission-2.52-arm-1.txz


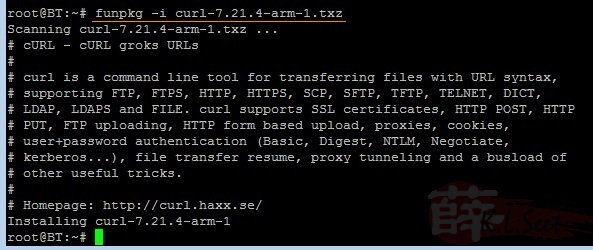
Run the following to install the 2 packages, one after another:
funpkg -i curl-7.21.4-arm-1.txz
funpkg -i Transmission-2.52-arm-1.txz

IMPORTANT!!
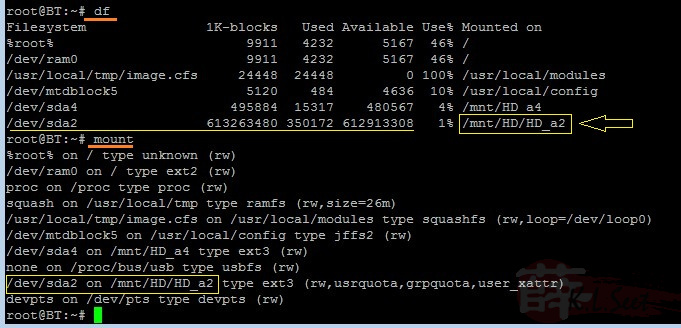
Run the following to check & write-down the actual directory path
Noticed my DNS-320 HDD actual mount path is /mnt/HD/HD_a2
Run Transmission for the first time:
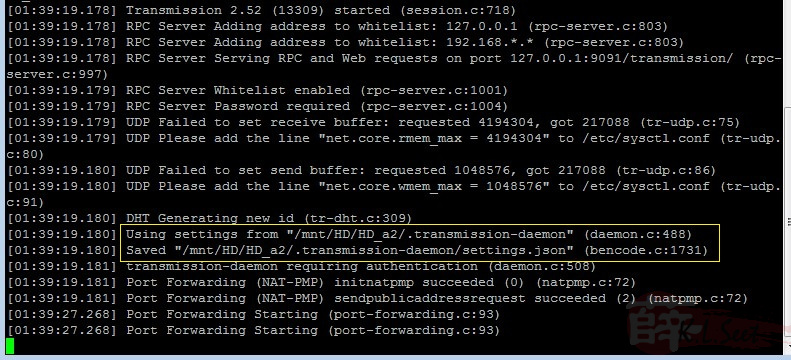
su nobody -c "transmission-daemon -f -g /mnt/HD/HD_a2/.transmission-daemon -w /mnt/HD_a2/Downloads -t -u <Your-Desire-UserID-Here> -v <Your-Desire-Password-Here> -a 127.0.0.1,192.168.*.*"

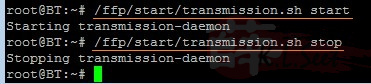
Wait at least 20sec, if see something like this means Transmission is running fine
If didn't see similar result like above, stop here & re-check/re-run every steps again.
Once ok, press Ctrl+C to stop it, wait for at least 20sec

If wish to Start or Stop Transmission manually, always use this command:
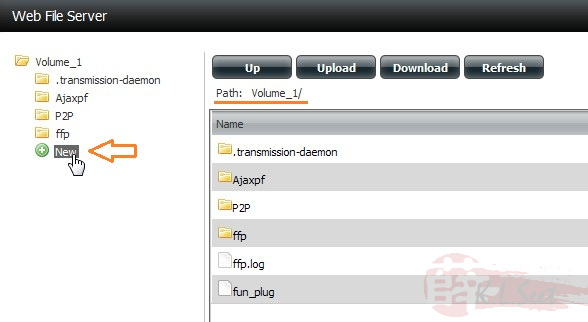
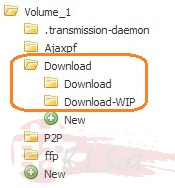
Next I created some folders using the standard webgui as follows
Then chmod the directory

WinSCP login to the device, navigate to the following path:
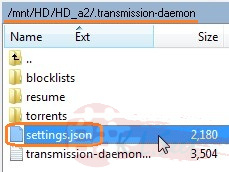
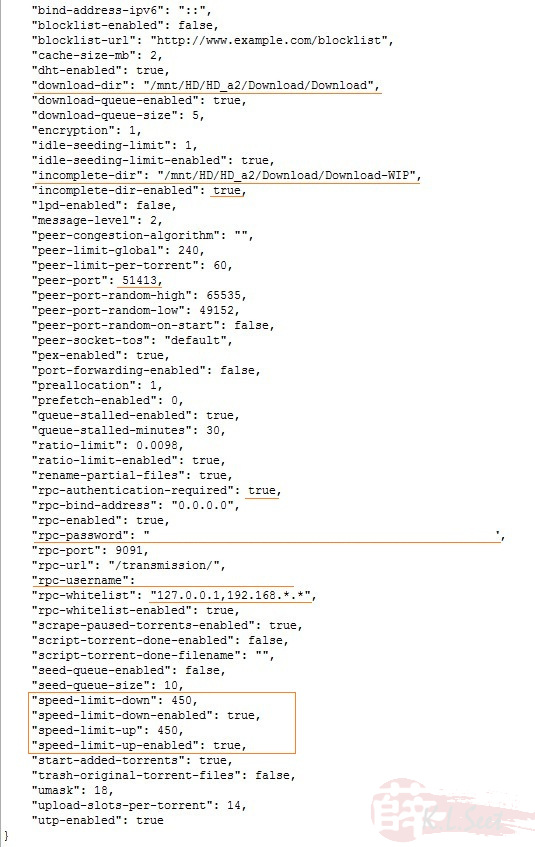
edit the settings.json file accordingly
Reboot the device, FunPlug + Transmission installation completed !!
Running Transmission
After device rebooted, open browser and navigate to : http://<TheDevice'sIP>:9091
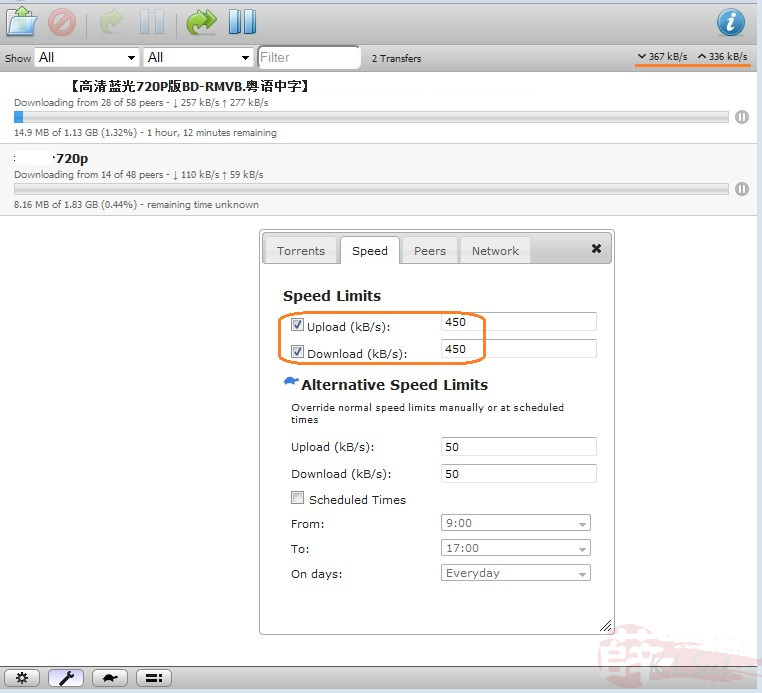
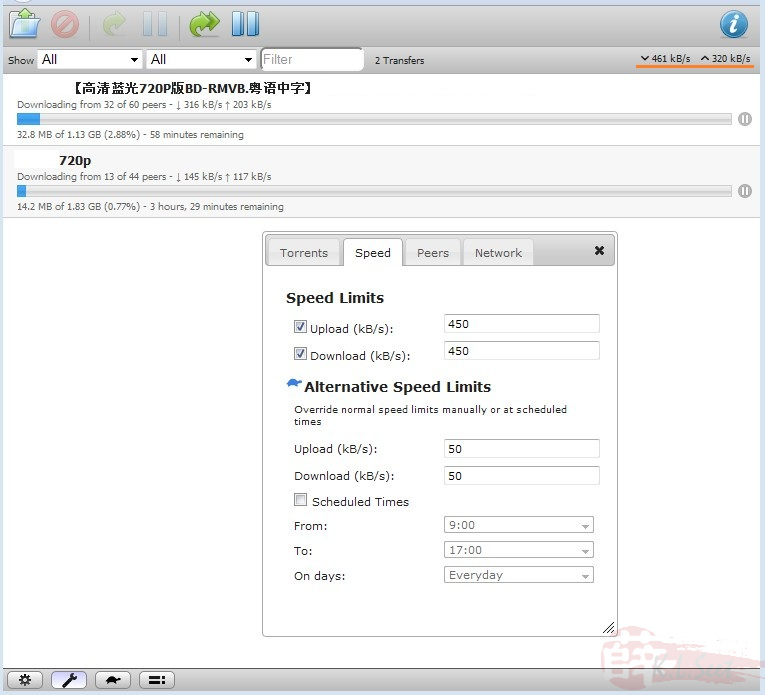
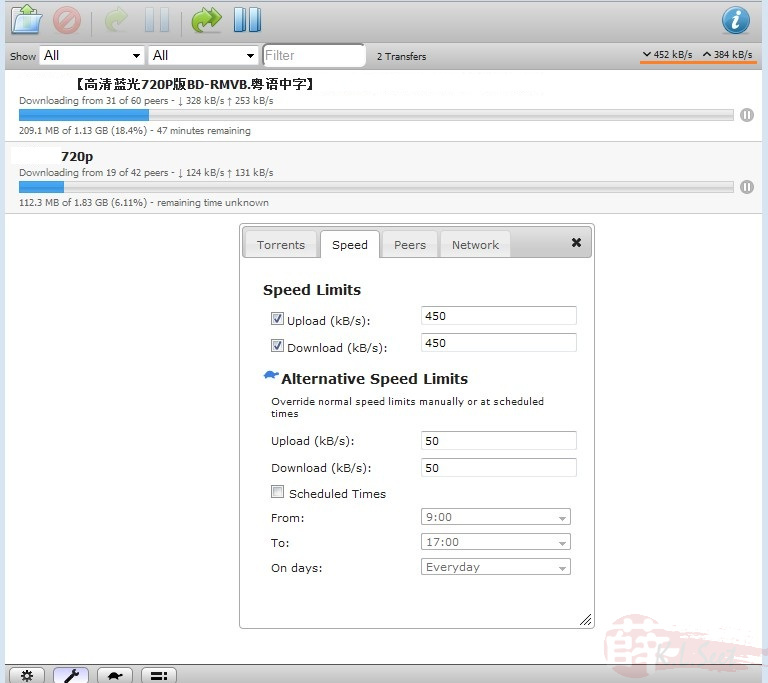
I usually set up/down load limit as follows based on my VIP5 package, torrenting full-speed all the way without any problem, enjoy !